Out Come Screwdrivers
Having introduced you to the system, it's time to take it apart. I thought this would be a nightmare, but it's actually not as bad as you would expect. The first trick was to remove that mighty heatsink and get the processors out. Getting rid of the heatsink is a piece of cake - on the FW800 model you just undo four screws, one in each corner. Don't mistake that screw in the middle for a heatsink screw! It holds on the modem filter - just leave it as it is. There's a fifth one on the MDD version apparently, so look out for that. You may find the Service Manuals handy if you're unsure about what you're up to.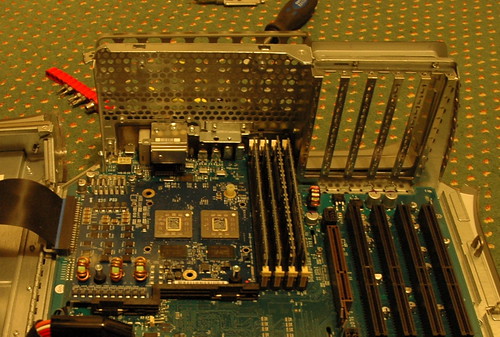
You should end up with something like this. Notice that I've already removed the AGP and PCI cards, and I've popped off the rear plastic cover to add mounts for some new fans. Good instructions for this exist on Steve Smedley's aircooling pages at AquaMac, so suffice it to say that there are two bolts to undo and two plastic tabs to bend out an unnervingly long distance (easiest done with your screwdriver poking out of Slot 5). Please note that you can't now just plonk your heatsink back on the processors if you've decided you've had enough! By removing the heatsink you disturb the thermal compound that aids the transmission of heat from processor to metal, which you must reapply before powering back up. But you probably know that already.
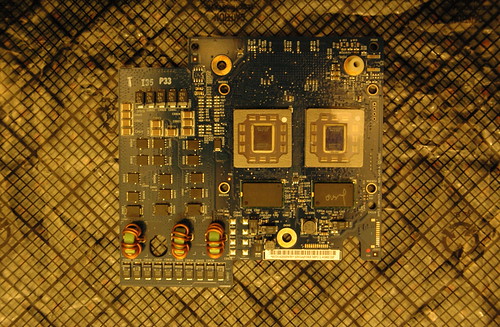
Getting the processor module itself out is also remarkably simple - just go slow. The pic above shows the module as you would see it from the front of the machine. Just put your index fingers under the top two corners and very gently ease it upwards out of the socket, making sure you're properly grounded at all times. It'll pop up when you least expect it and you can then get some compressed air and blast off the dust that'll be caked around the power section. The 1.42GHz modules have three-phase power, others are two-phase, and above is a shot of mine just before being packed off down to Steve for modifications.
If you're going for a bit of overclocking, head over to the MDD Overclocking Guide on the bitsandpieces.info website. There you'll find some much better pictures of the processor module, as well as all of the resistor positions for the processors and voltage regulator. I was a little concerned about the effect on the L3 cache (four 512KB Samsung K7D803671B-HC30 chips, two of which can be seen just above the processors on my picture above) and whether they would require heatsinks, but it turns out they are rated up to a maximum of 370MHz. At the stock 1.42GHz they run at 237MHz, at 1.50GHz they run at 250MHz and at 1.58GHz they sit at 264MHz, generating very little heat, so I don't think it's anything to worry about. Check which cache memory chips you've got, though - they vary between boards, especially if you have 1MB L3 cache instead of 2MB.
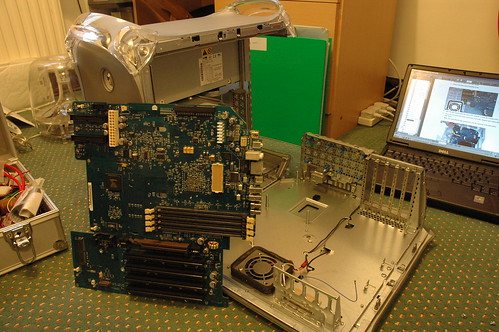
Once the logic board is clear of cards, processors and power connectors, you can slide the processor stiffener up and off the board (the black plastic thing that keeps the processor module in place) and undo the single screw to the left of the optical drive fan which holds the motherboard in place. Gently pull the logic board towards the front of the case and it will come free from the hooks. Watch that you don't catch your Airport and Bluetooth antennae on the way out - it's easily done.
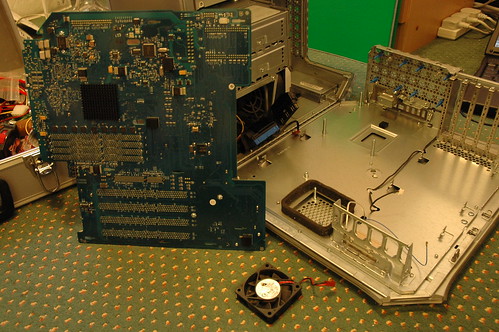
Take the optical drive fan out by unscrewing the cover, sliding it to the side and lifting off the metal poles. The fan (a Delta AFB0612HHB) sits further down these poles - just lift it out, carefully feeding the wire underneath the foam insulation. It'll probably be quite dusty in here.
If you look carefully, you might also spot some small blue rubber fan mounts have appeared at the back of the case...
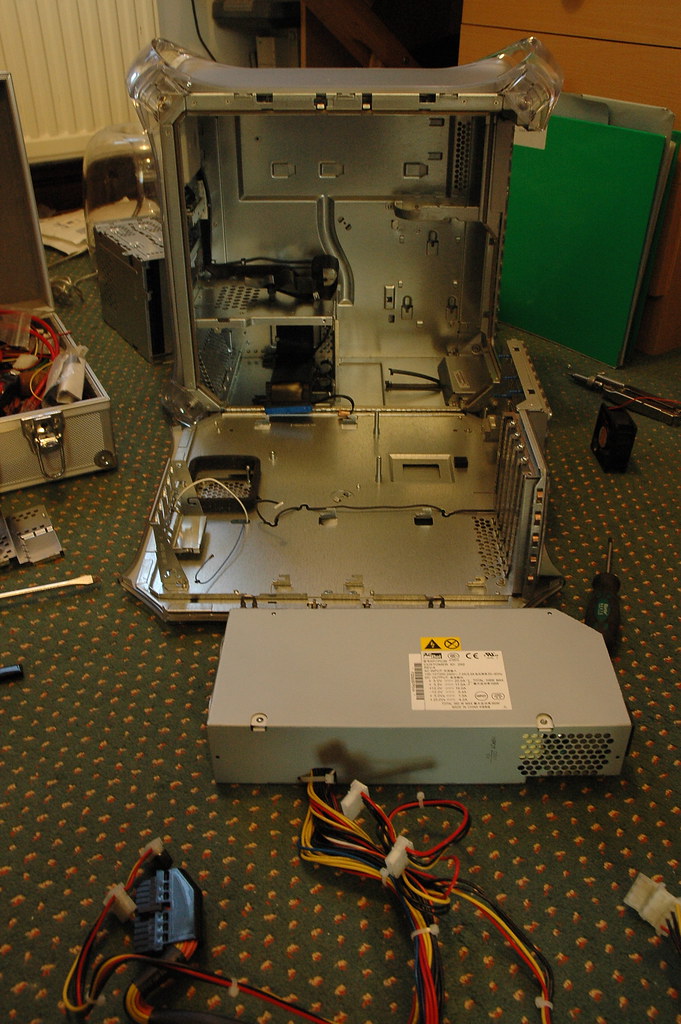
Last of all, I removed the power supply. Yes, I did ignore the warnings and yes, I did open it up and clean inside. I cannot recommend that you do this. There may be seriously high residual charges in the capacitors and you should not open the power supply unless you are 100% sure about what you are doing. One kick from a charged capacitor in there and you will quite probably be dead. Read the disclaimer, read the disclaimer.
Having said all that, there was a fair bit of dust around the fans in there so I am glad that I cleaned it. My PSU has always been quiet as a mouse, so for those that are interested it contains two Nidec Beta V TA225DC fans, model M34418-16. They are utterly silent so far as I've experienced, and are mounted with thin rubber between themselves and the metal of the PSU. Apple obviously went to some trouble here. ;o)
The main locations for dust buildup (ignoring the PSU) were the optical drive fan and foam surround, the area around the mounting for the 120mm fan, the side wall in front of the PSU near the speaker and the processor module corner nearest the big fan.
New Parts >>